About Docker-Compose
docker-compose is a tool for defining and running multi-container Docker applications. It allows you to define your application's services, networks, volumes, and other configurations in a YAML file (docker-compose.yml) and spin up all the containers specified in that file with a single command.
In essence, docker-compose creates an isolated environment for your application's various services to run together. This can be particularly useful for complex applications that require multiple services or dependencies (e.g., databases, message queues, etc.). Additionally, docker-compose simplifies the process of scaling your application by allowing you to easily add or remove instances of your services as needed.
There are several reasons why we should use Docker Compose:
Application definition: Using Docker Compose, developers can define their entire application stack in a single file. This makes it easy to share and version control the architecture of the application.
Multi-container deployment: With Docker Compose, you can deploy multi-container applications by defining each service separately. The containers will be able to communicate with each other seamlessly.
Simplicity: Docker Compose simplifies the process of managing containers. Developers can start, stop, or restart their entire application stack with a single command.
Replication: Using the scaling feature in Docker Compose, developers can easily replicate their application services horizontally to increase capacity.
Consistency: Docker Compose helps ensure that development environments are consistent across different machines. This eliminates the issue of "works on my machine" and makes it easier to debug issues.
Overall, docker-compose streamlines the development and deployment of multi-container applications while maintaining consistency and reproducibility across different environments.
Installation of Docker in Ubuntu
To install Docker add the following commands step by step in your terminal:
# update your packages
sudo apt-get update

# Install Docker's dependencies
sudo apt-get install apt-transport-https ca-certificates curl gnupg-agent software-properties-common

# Add Dockers official GPG key
curl -fsSL https://download.docker.com/linux/ubuntu/gpg | sudo apt-key add -

#Add the Docker repository to your system:
sudo add-apt-repository "deb [arch=amd64] https://download.docker.com/linux/ubuntu $(lsb_release -cs) stable"

#Update your package again
sudo apt-get update

#Finally, install Docker
sudo apt-get install docker-ce docker-ce-cli containerd.io

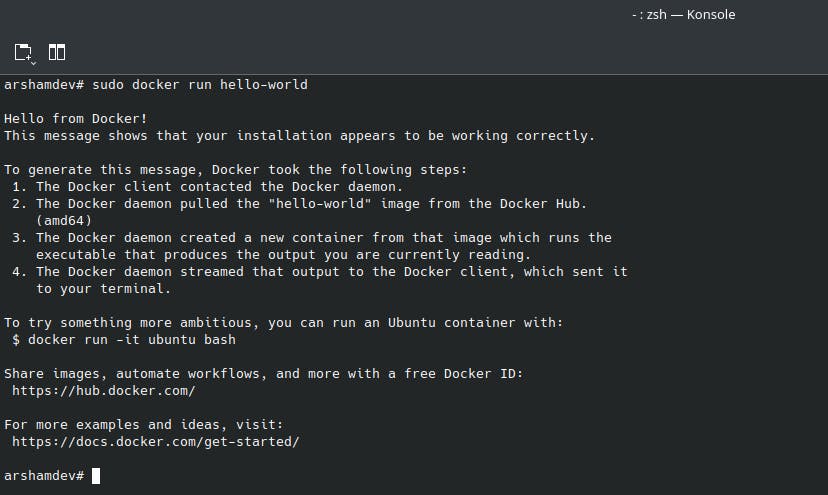
#Verify that Docker has been installed correctly by running the following command
sudo docker run hello-world

To add a user to the docker group on Linux, you can follow these steps:
Open a terminal window and enter the following command:
sudo usermod -aG docker <username>
Replace <username> with your actual username.
Log out of your current session and log back in for the changes to take effect.
That's it! Now, you should be able to run Docker commands without having to use sudo every time.
Installation of Docker-Compose in Ubuntu
1. Download the Docker Compose binary using curl:
sudo curl -L "[https://github.com/docker/compose/releases/latest/download/docker-compose-$(uname](github.com/docker/compose/releases/latest/d.. -s)-$(uname -m)" -o /usr/local/bin/docker-compose
This command retrieves the latest version of Docker Compose, so you'll always be up to date.
2. Make the Docker Compose binary executable:
sudo chmod +x /usr/local/bin/docker-compose
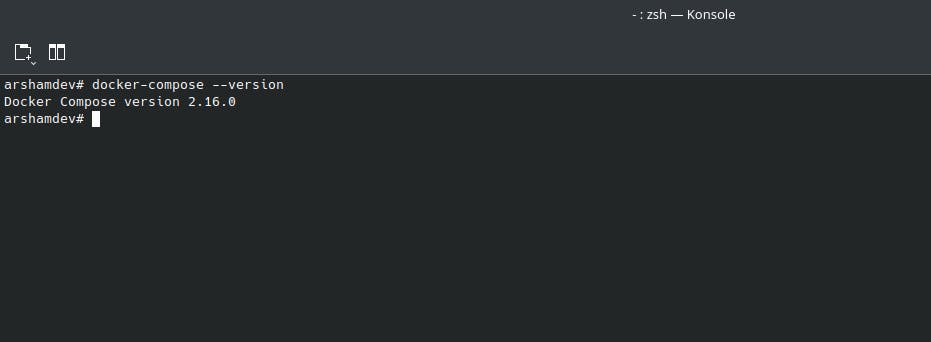
3. Verify that Docker Compose has been installed correctly by running the following command:
docker-compose --version
You should see output similar to this: docker-compose version 1.27.+0 build unknown.

That's it! You now have both Docker and Docker Compose installed on your Ubuntu system.
Docker-Compose Commands
Here are some commonly used Docker Compose commands:
docker-compose up: Builds, (re)creates, starts, and attaches to containers for a service.docker-compose build: Builds or rebuilds services.docker-compose start: Starts existing containers for a service.
Stopping and removing containers
docker-compose down: Stops and removes containers, networks, images, and volumes.docker-compose stop: Stops running containers without removing them.
Listing and managing containers
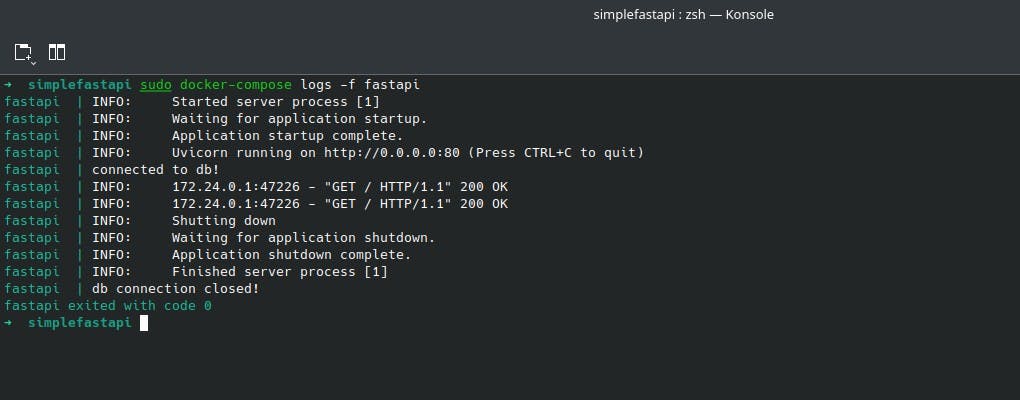
docker-compose ps: Lists containers that are managed by the current Docker Compose project.docker-compose logs: Displays log output from services.docker-compose exec: Runs a command in a running container.
Docker Compose YAML Commands
Docker Compose configuration file is written in YAML format. Here are some example commands used in docker-compose.yml files:
version: Version of the Compose file syntax.services: Define containers.image: Specifies the name(s) of the image(s) that should be used to create the container(s).ports: Expose ports from container(s) to host.volumes: Define shared or persistent data storage locations between containers or host machine.links: Link dependencies between services.environment: Set environment variables....
These are just a few examples of the many commands provided by Docker
Compose. For more information, you can check out the official documentation.
Using Docker-Compose
Let's connect the small project that we wrote in this article to the database and use DockerCompose to run the Fast API container and the database.
Do not modify Dockerfile. Change the main.py and requirements.txt file with the following contents:
#requirements.txt
fastapi
uvicorn
databases
psycopg2-binary
asyncpg
databasesis a Python package that provides an easy and simple interface for interacting with relational databases using the async/await syntax. It simplifies common database operations like querying, inserting, updating and deleting data from a variety of relational databases like SQLite, MySQL, PostgreSQL, Oracle, and more. Thedatabasespackage also includes built-in support for SQLAlchemy Core, which allows developers to use its powerful features like schema and dialects.psycopg2-binaryis a Python library/package that provides PostgreSQL database connectivity to Python programs. It is built on top of thepsycopg2package, which is a C wrapper around the PostgreSQL client library, and is designed to be both efficient and easy to use.asyncpgis a Python library used for accessing PostgreSQL databases asynchronously. The package provides an easy-to-use API for synchronous and asynchronous programming models, making it possible to create high-performance database applications in Python. The module uses the asyncio framework for all of its asynchronous network I/O, making it well-suited for use with concurrent applications.
#main.py
from fastapi import FastAPI
import databases

app= FastAPI()

DATABASE_URL = "postgresql://db_user:db_password@postgres:5432/db"
database=databases.Database(DATABASE_URL)

@app.get("/")
async def index():
    return {"response":"Hello World"}

@app.on_event("startup")
async def startup():
    await database.connect()
    print("connected to db!")

@app.on_event("shutdown")
async def shutdown():
    await database.disconnect()
    print("db connection closed!")
The above code sets up a database connection using the databases package in Python. The DATABASE_URL variable specifies the URL where the database is hosted, and the Database class from databases create a client to connect to it.
In this specific case, the database being used is a PostgreSQL database located at postgres:5432, with a user of db_user and a password of db_password. The name of the database being connected is db.
Once the client is created, it can be used to execute SQL queries against the connected database.
async def startup(): ...: This function connects to the database when the FastAPI app starts up.async def shutdown(): ...: This function closes the database connection when the FastAPI app shuts down.
Now it's time to use docker-compose. Go to the project folder and create a .yml file:
cd ~/Desktop/simplefastapi && touch docker-compose.yml
Add the following contents to the yml file:
version: "3.9"

services:
  postgres:
    image: postgres:latest
    container_name: postgres
    volumes:
      - db_data:/var/lib/postgresql/data/
    ports:
      - "5432:5432"
    environment:
      - POSTGRES_USER=db_user
      - POSTGRES_PASSWORD=db_password
      - POSTGRES_DB=db
  fastapi:
    build:
      context: .
      dockerfile: Dockerfile
    container_name: fastapi
    ports:
      - "80:80"
    depends_on:
      - postgres

volumes:
  db_data:
This is a docker-compose file, which defines two services postgres and fastapi. The postgres service is using the official PostgreSQL Docker image to create a container running PostgreSQL.
image: postgres:latest: specifies that we want to use the latest version of the official PostgreSQL image from Docker Hub.container_name: postgres: sets the name of the container to “postgres” to make it easier to identify in logs and commands.volumes: - db_data:/var/lib/postgresql/data/: creates a named volume calleddb_data, which will be used to store PostgreSQL data files persistently. It also mounts this volume on the container’s/var/lib/postgresql/data/directory, where PostgreSQL stores its database files by default.ports: - "5432:5432": maps the host machine’s port 5432 to the container’s port 5432, so that PostgreSQL can receive connections from outside the container.environment:sets environment variables within the PostgreSQL container. In this case, we set thePOSTGRES_USER,POSTGRES_PASSWORD, andPOSTGRES_DBvariables to create a new PostgreSQL user and database with the specified credentials.The
fastapiservice builds a Docker image from the provided Dockerfile and runs it as a container.build: specifies the context of the build (the current directory.) and the name of the Dockerfile (Dockerfile) to use for the build.container_name: fastapi: sets the name of the FastAPI container to “fastapi”.ports: - "80:80": maps the host machine’s port 80 (HTTP) to the container’s port 80, allowing us to access our API through HTTP requests.depends_on: - postgres: tells Docker to start thepostgresservice before starting thefastapiservice
Finally, volumes: db_data: simply declares the db_data volume, which was defined earlier for PostgreSQL, to ensure that it is properly created when the compose file is deployed
Build and Run Containers
Now we start all the containers with docker-compose up --build -d command.
running docker-compose up --build -d command will build the Docker images defined in the docker-compose file before starting the containers.

thank you!
